Understand
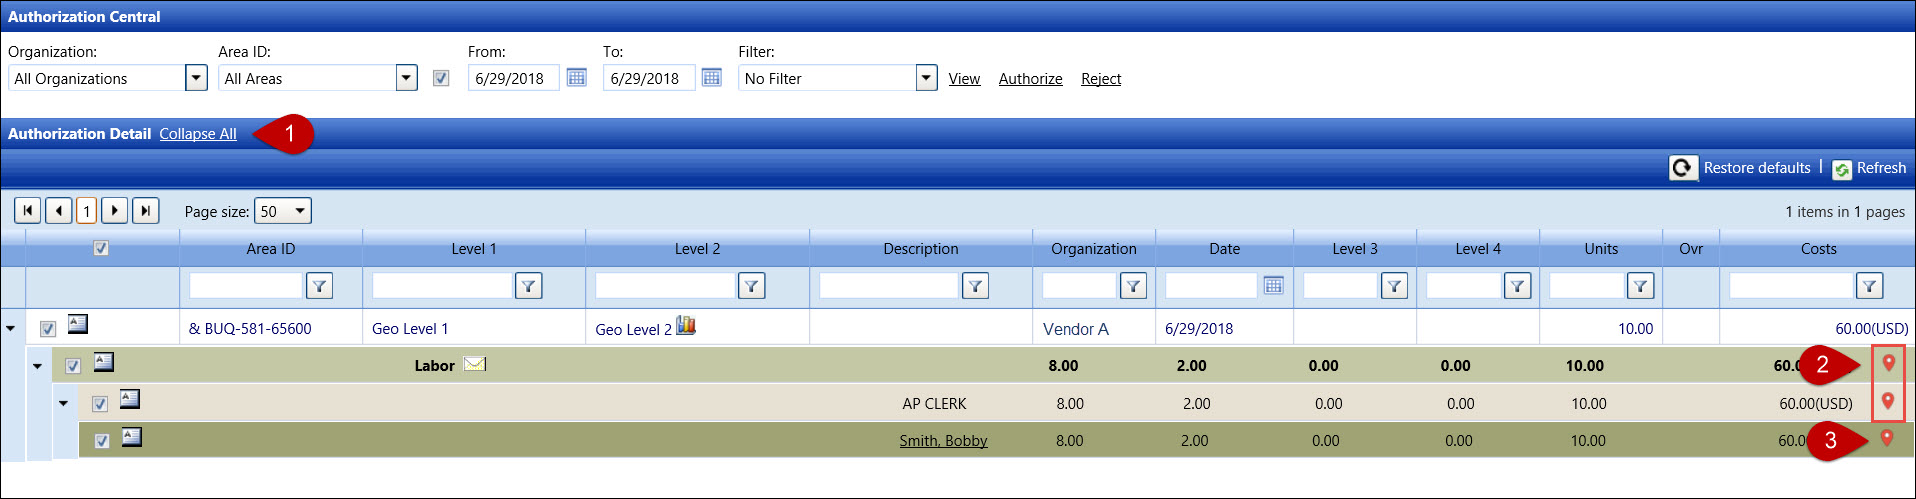
Authorization Central screen for Geo Authorization
From the Authorization screen, the Geo-Point icon is displayed on each
line item associated with the boundaries. Click the Geo-Point
icon to open the Labor Detail dialog box, displaying the map with the
defined boundaries and all IN/OUT activities associated with the selected
labor resource. At this point, the approver will follow the normal process
to approve or reject the allocations.
If the allocations are not found in the supplied plant codes, the event
numbers for the IN/OUT activities are displayed on the map but without
the boundaries or Geo-Point icons.
From the Authorization Central screen, select the organization,
area, or date where is applicable.
Select the Labor option
from the Filter drop-down
list.
Click the View link
to display the hours ready for authorization in the Authorization
Detail grid.

Once the Expand All
link is selected, the Collapse All link interchanges and displays.
From the Authorization Detail grid, all line items expand, displaying
the hours, costs, and the Geo-Pin icon
The green Geo-Pin
icon represents all events are within the boundary. However, if
an event is outside the defined boundary, then the red
Geo-Pin icon is displayed.
On the second line item, click the Geo-Pin
icon to open or close the Skill line item. Then click the Geo-Pin icon on the Skill line
item to open or close the Resource line item.
Click the Geo Pin
icon on the Resource line item to open the Labor Detail dialog
box. Refer to Understand
Geo Authorization Area for more information.
Understand Geo Authorization
Area
From the Authorization Central screen, click the Geo-Point
icon on the Resource line item to open the Labor Detail dialog
box, displaying the selected resource's hours, costs, and the Geo Authorization
information.
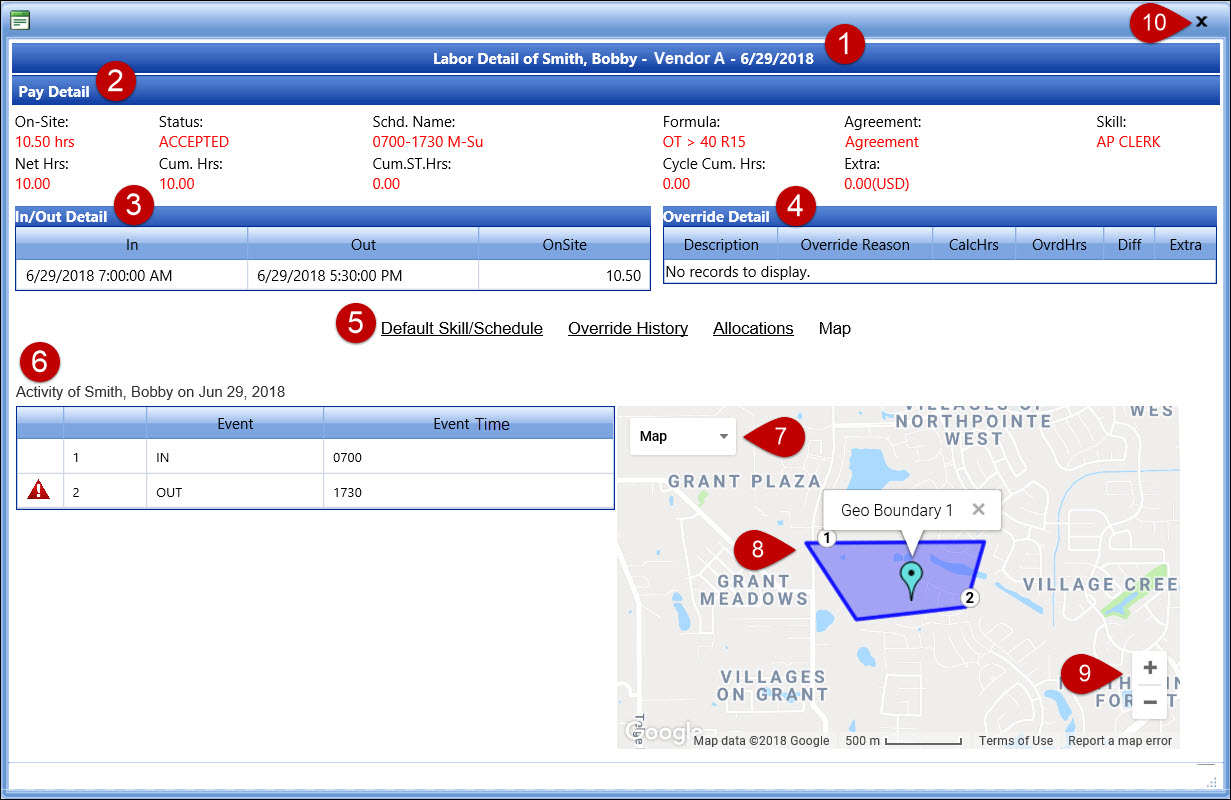
Selected labor resource name, organization, and selected timesheet
date are displayed.
From the Pay Detail grid, the selected labor resource's pay
detailed information is displayed.
The In/Out Detail grid displays the captured IN/OUT events.
Refer to Resource
Event for more information.
The Override Detail grid displays the override information.
Refer to Override Labor Hours and Extra
Charges for more information.
Click one of the Labor Details links to directly display the
selected link’s information. Refer to Understand
Labor Detail Dialog Box for more information.
The Geo Authorization grid displays the following information.
If the events are within the boundary, then the event line
item in the first column will be blank. However, the red alert
icon is displayed if the events are out of the defined boundary,
if the GPS is missing the coordinates, or if the allocated hours
are missing the Geo Validation.
The second column displays the events in the order they
were captured and occurred in relation to the allocation and boundary.
The Event column displays the event’s IN or OUT status.
The Event Time displays the IN or OUT time in the 24-Hours
format.
The Map option displays
the map imagery in Google Map. Select the Satellite
option from the drop-down list to view the map imagery in Google Earth.
This image represents the Geo Boundary Data. The event numbers
indicate the event’s IN or OUT.
Click the Zoom icon
to zoom the map in or out.
Click the Close icon
to close the Labor Detail dialog box.
Related Topics
Geo Authorization Overview
Geo Boundaries Data
Geo Validation