Schedules must be assigned to an organization before they can be assigned
to a labor resource. The assigned schedule cannot be edited. Thus,
create a new schedule assignment to reset the start and end dates.
If applicable, select a location from the Location
drop-down list located at the menu bar.
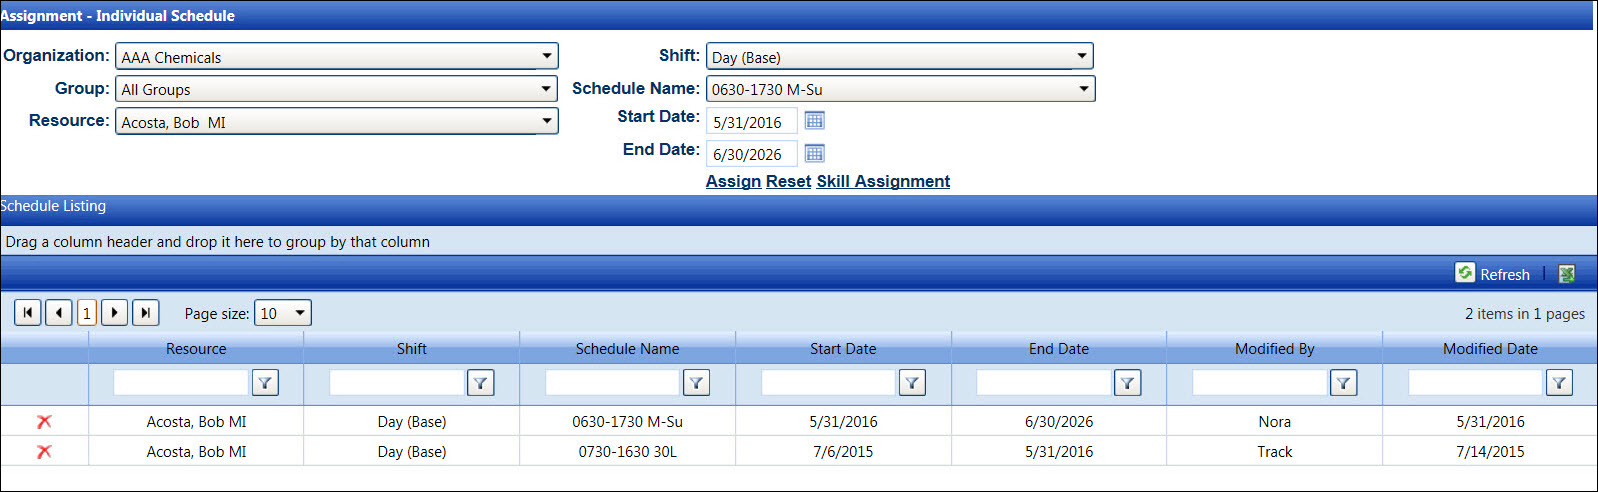
From the Assignment - Individual Schedule screen, select an
organization from the Organization
drop-down list.
The All Groups in the
Group drop-down list is selected by default. Select a specific group
from the Group drop-down list.
Otherwise, proceed to the next step.
Select a labor resource from the Resource
drop-down list. If the selected labor resource has previously assigned
working schedules, they are displayed in the Schedule Listing.
Select a shift from the Shift
drop-down list.
Select a schedule from the Schedule
Name drop-down list.
Enter the schedule start date into the Start
Date text box, or select the date from the calendar. Leave
the End Date set to default.
As new schedules are assigned, the End Date(s) will adjust accordingly.
(see also Date Format)
Click Assign to save
and display the assigned working schedule in the Schedule Listing.
Select another labor resource from the Resource drop-down list
then repeat steps to assign a schedule to the selected labor resource.
Schedule cannot be edited. Keep all schedules that have been used for
the schedule history references. Delete only a schedule that was initially
entered incorrectly and has not been used.