In order to display the records, the date range must be less than 30
days. Refer to Understand Authorization Central
Screen for screen laid out, icons, and other related information such
as Pay Detail dialog box. Use the filter features to search for hours,
other costs, or charges. Refer to Understand
Track Screen Controls for more information. For the area ID forwarding
feature, refer to Area
ID Forwarding for more information.
If applicable, select a location from the Location
drop-down list located at the menu bar.
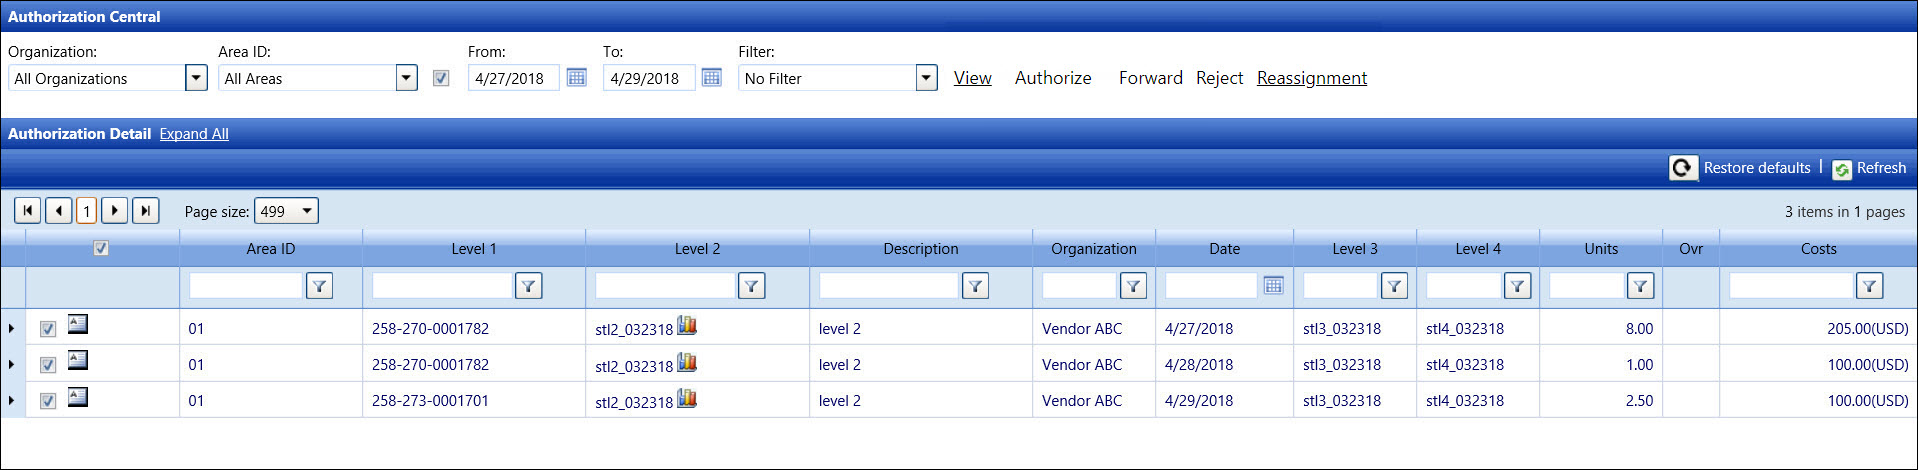
From the Authorization Central screen, the All
Organization option in the Organization drop-down list is selected
by default. Select a specific organization from the Organization
drop-down list. Otherwise, proceed to the next step.
The All Areas option
in the Area ID drop-down list is selected by default. Select a specific
area ID from the Area ID drop-down
list or select Reviewed for Me
or All Reviewed Allocations
option to restrict the view to only Reviewed Allocations. Otherwise,
proceed to the next step.
Click the checkbox,
located between the Area ID drop-down list and the From text box,
to enable the From and To text boxes and calendars.
Enter a timesheet date or date range into the From
and To text boxes. Alternatively,
select the dates from the calendars. (see also Date
Format)
The No Filter option
in the Filter drop-down list is selected by default. To display only
labor, equipment, or material items, click the Filter
drop-down list to select Labor,
Equipment, or Material
option.
Click the View link
to display the hours, other costs, or charges that are ready to be
authorized. The records, displaying in the Authorization Detail grid,
are grouped by a timesheet date and only display up to thirty days
prior the selected From date.
To expand and display all line items, click the
Expand All link located next to the Authorization Detail grid's
header.
Alternatively, click the Expand
icon to open the selected line item, displaying the hours, other costs,
or charges.
Click a checkbox on
each line item to select the hours, other costs, or charges to be
authorized. Alternatively, click the checkbox, located in the column
header, to select all of the line items that display on the selected
page.
Click the Authorize
link to process the authorization for the selected hours, other costs,
and charges. The message displays, "Timesheet(s) created successfully."
From the menu bar, select a location from the Location
drop-down list located at the menu bar.
From the Authorization Central screen, the All
Organization option in the Organization drop-down list is selected
by default. Select a specific organization from the Organization
drop-down list. Otherwise, proceed to the next step.
The All Areas option
in the Area ID drop-down list is selected by default. Select a specific
area ID from the Area ID drop-down
list. Otherwise, proceed to the next step.
Click the checkbox next,
located between the Area ID and the From text box, to enable the From
and To text boxes and calendars.
Enter a timesheet date or date range into the From
and To text boxes. Alternatively,
select the dates from the calendars. (see also Date
Format)
The No Filter option
in the Filter drop-down list is selected by default. To display only
labor, equipment, or material items, click the Filter
drop-down list to select Labor,
Equipment, or Material
option.
Click the View link
to display the hours, other costs, or charges that are ready to be
authorized. The records, displaying in the Authorization Detail grid,
are grouped by a timesheet date and only display up to thirty days
prior the selected From date.
To expand and display all line items, click the
Expand All link located next to the Authorization Detail grid's
header.
Alternatively, click the Expand
icon to open the selected line item, displaying the hours, other costs,
or charges.
Click a checkbox on
each line item to select the hours, other costs, or charges to be
rejected.
For each line item, click the Rejected
Time Comments icon  to enable the text box.
Enter a reason for rejection on each line item into the Rejected Time Comments text box.
Click the Reject link
to reject the selected hours, other costs, and charges. The message
displays, "Timesheet(s) rejected successfully." The rejected
item and its comment will appear as an internal message and will display
on the Track Home screen. They will also appear on the Allocation
Detail dialog box. Refer to Resolve Rejected
Labor Hours and Costs to resolve the rejections.