Hover a mouse pointer over the Settings menu on the menu bar to display its drop-down menu.
Slide a mouse pointer over the Global Values option then Cost Objects to display its menu options.
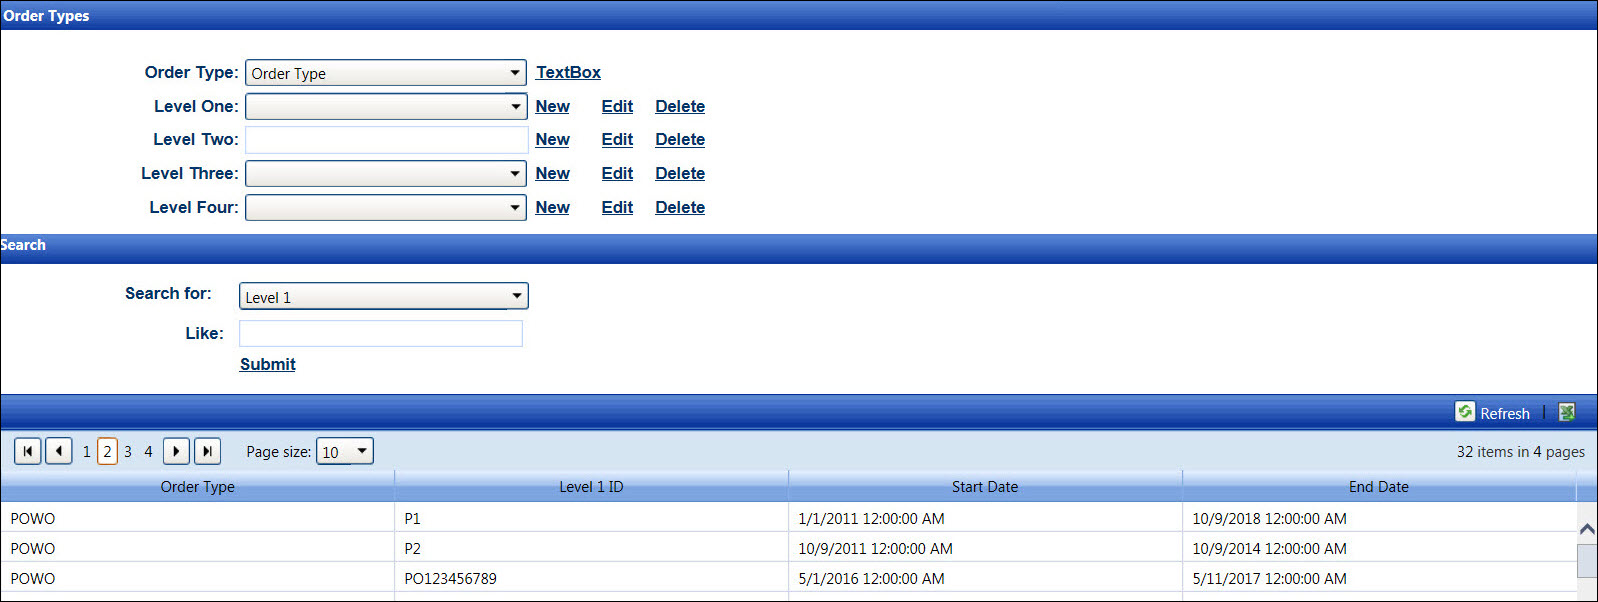
Click Order Types to
open the Order Types screen.
Hover a mouse pointer over the Settings menu on the menu bar to display its drop-down menu.
Slide a mouse pointer over the Global Values option then Cost Objects to display its menu options.
Click Order Types to
open the Order Types screen.
If applicable, select a location from the Location drop-down list located at the menu bar.
From the Order Types screen, select an order type from the Order Type drop-down list.
Follow the instructions listed below to create, edit, or delete Levels.
The Levels are defaulted to display in text box feature. For the drop-down list feature, click the Dropdown List link to enable the Level One, Three, and Four drop-down lists. Because the Level Two information is lengthy, populating the Level Two as a drop-down list will cause a delay. Thus, the Level Two is set up as a text box by default, and its information must be entered manually.
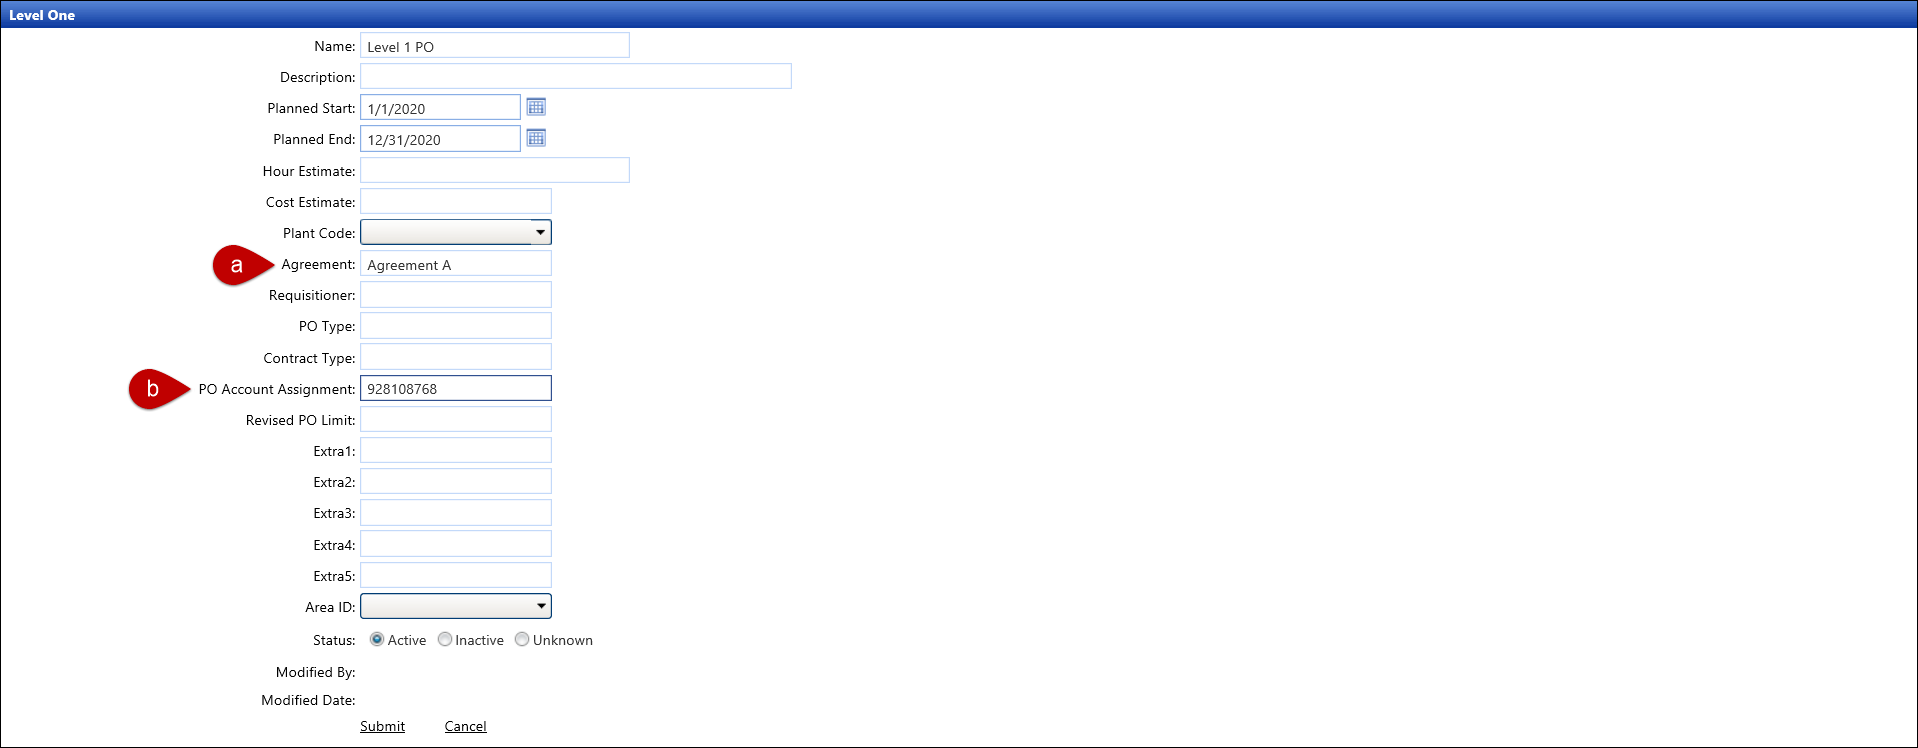
After the Order Type is selected, click New next to the Level One text box to open the Level One screen.
Select and/or enter the Level One information into the appropriate drop-down lists, buttons, and text boxes.
The Active button is selected by default. Click Inactive or Unknown to change the Level One status.
Click Submit to save the Level One information and return to the Order Types screen.
NOTE: If the PO to Agreement Validation or Level 2 Information Defaulting when PO is Selected/Entered features are enabled at the Location Settings, make sure to:
Enter the agreement into the Agreement text box for the PO to Agreement Validation feature. Refer to Enable PO to Agreement Validation for more information.
Enter the PO account assignment into the PO Account Assignment text box for the Level 2 Information Defaulting when PO is Selected/Entered feature. Refer to Enable Level 2 Automatically Defaulting when PO is Selected/Entered for more information.
After the Order Type and the Level One are selected, click New next to the Level Two text box to open the Level Two screen.
Select and/or enter the Level Two information into the appropriate drop-down lists, checkboxes, and text boxes.
Click Submit to save the Level Two information and return to the Order Types screen.
After the Order Type, Level One, and Level Two are selected, click New next to the Level Three text box to open the Level Three screen.
Select and/or enter the Level Three information into the appropriate text boxes.
The Active checkbox is selected by default. Click the checkbox to deselect it, changing the Level Three status to Inactive. Otherwise, proceed to the next step.
Click Submit to save the Level Three information and return to the Order Types screen.
After the Order Type, Level One, Level Two, and Level Three are selected, click New next to the Level Four drop-down list to open the Level Four screen.
Select and/or enter the Level Four information into the appropriate checkbox and text boxes.
The Active checkbox is selected by default. Click the checkbox to deselect it, changing the Level Four status to Inactive. Otherwise, proceed to the next step.
Click Submit to save the Level Four information and return to the Order Types screen.
If applicable, select a location from the Location drop-down list located at the menu bar.
From the Order Types screen, select an order type name from the Order Type drop-down list to enable the Levels listing.
Enter the Level One cost object into the Level One text box.
Click Edit next to the Level One text box to open the Level One screen.
Make the changes then click Submit to save the modifications and return to the Order Types screen.
Repeat the steps to modify Level Two, Three, or Four.
If applicable, select a location from the Location drop-down list located at the menu bar.
From the Order Types screen, select an order type name from the Order Type drop-down list.
Enter the Level One name into the Level One text box.
Click Delete next to the Level One text box. The delete confirmation pop-up message appears.
Click OK to delete the selected Level One and its sub Levels.
If Level One is to remain in the Order Type but Level Two needs to be removed from Level One, click Delete next to the Level Two text box to delete the selected Level Two and its sub Levels. The steps apply to remove Level Three or Level Four.
Related Topics