Hover a mouse pointer over the Settings menu on the menu bar to display its drop-down menu.
Slide a mouse pointer over the Global Values option then Cost Objects to display its menu.
Click
External Systems to open the
External Systems screen.
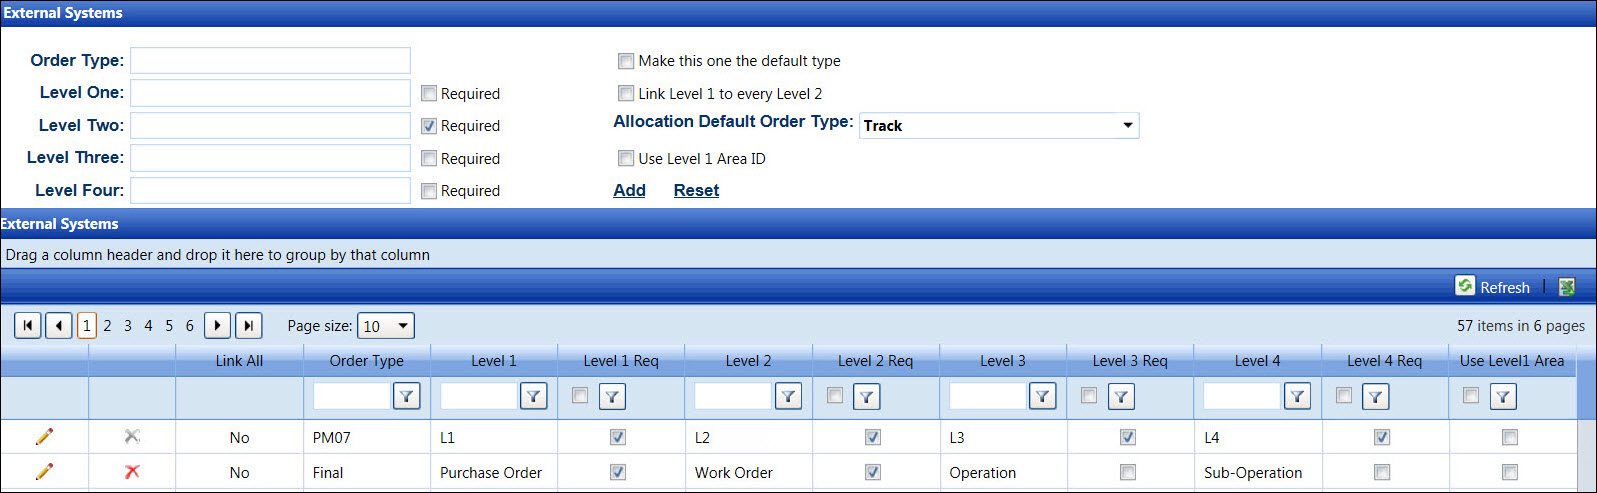
Work order structures are setup and defined in the External Systems screen. Each level name, Order Type, Level 1, Level 2, Level 3, or Level 4 can be customized according to the company’s standards. Level names are set up to match vendor invoice, project definitions, or other criteria.
Hover a mouse pointer over the Settings menu on the menu bar to display its drop-down menu.
Slide a mouse pointer over the Global Values option then Cost Objects to display its menu.
Click
External Systems to open the
External Systems screen.
The work order structure includes the order type and levels. Once the work order structure is created, it will appear as drop-down list or text box names in the Order Types screen. If the Link Level 1 to every Level 2 option is enabled, or sometimes referred to as the Universal PO option, there is not a direct link for Level One items to Level Two items for this order type. Thus, for companies using Level One as a purchase order number, the timekeeper can select this order type, select a purchase order number for the Level One, then use any work order for the Level Two.
If applicable, select a location from the Location drop-down list located at the menu bar.
From the External Systems screen, enter a new work order type into the Order Type text box.
Enter the level names into the Level One, Level Two, Level Three, and Level Four text boxes.
Click the Required checkbox on each Level to enable the feature that requires user to enter the information.
Only one order type can be set as the default. Click the Make this one the default type checkbox on the most frequently used order type.
Click the Link Level 1 to every Level 2 checkbox to allow the user to select a Level One item for this order type and then enter the information for any Level Two.
Select the allocation default order type from the Allocation Default Order Type drop-down list. Otherwise, proceed to the next step.
Click the Use Level 1 Area ID checkbox, if applicable.
Click Add to save and display the new order type and its information in the External Systems grid.
From the External Systems grid, click the Edit icon on a line item to enable the text boxes and checkboxes.
Make the changes then click the Update icon to save the modifications.
From the External Systems grid, click the Delete icon on a line item. The delete confirmation pop-up message appears.
Click OK to delete the selected order type.
Related Topic