Shift Differential
Open the Shift Differentials screen
Hover a mouse pointer over the Settings menu link on
the menu bar to display its drop-down menu.
Slide a mouse pointer over to the Labor
option to display its menu.
Click Rates to display
the Labor Agreement - Rates screen.
Alternatively, access the Labor Agreement - Rates screen by
clicking the Labor Rates link
on the Labor Agreement/Assign Skills screen.
If applicable, select a location from the Location
drop-down list located at the menu bar.
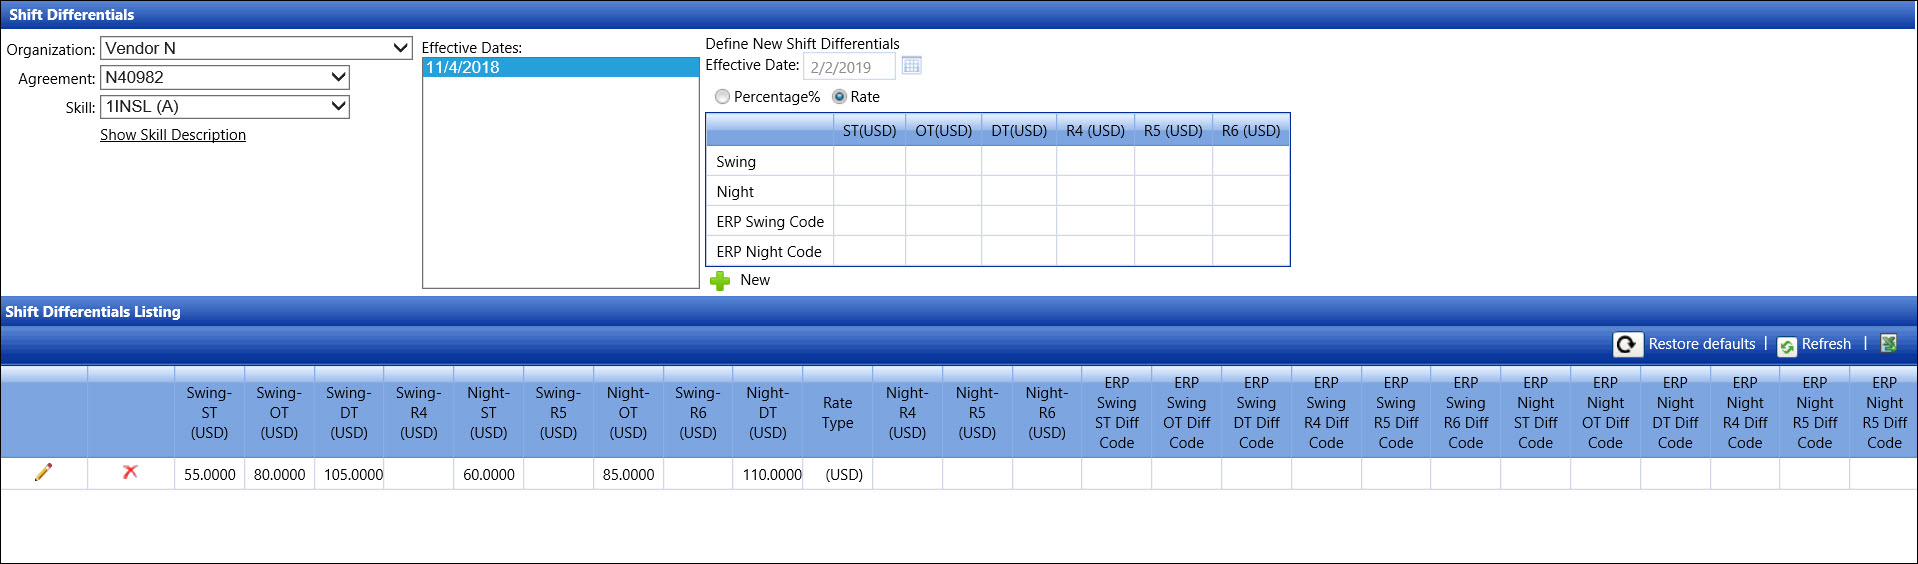
From the Labor Agreement - Rates screen, select an organization
from the Organization drop-down list.
Select an agreement from the Agreement drop-down list.
Click the Shift Differential link, located in the Define
New Rates area, to open the Shift Differentials screen.
Add shift differentials
Shift differentials are restricted to the agreement that is selected
from the Agreement drop-down list.
Each assigned effective date only has a line item of assigned shift differentials
that displays in the Shift Differential Listing. Click on the shift differential's
effect date in the Effective Dates
list box to display its shift differentials in the Shift Differential
Listing.
Shift differential is the amount added to a labor resource’s base rate
for all skills defined on the selected agreement. Shift differential is
not tied to any specific skill. To enter a rate change for a future date
for the same labor skill, click the New
button then enter a different effective date and rates into appropriate
text boxes. Enter a rate of zero for a specific skill will override the
rate set at the agreement level.
From the Shift Differentials screen, the <NONE>
option is a default in the Skill drop-down list. Proceed to the next
step to add the shift differential that applies to every skill for
the selected agreement. Otherwise, select a labor skill from the Skill drop-down list to apply a
shift differential only to a specific skill
Click the New button
to enable the buttons, Effective Date and Rates text boxes.
Enter the effective date into the Effective
Date text box. Alternatively, select the date from the calendar.
(see also Date
Format)
There are two different rate options.
Percentage option:
Click the Percentage% button. Enter the percentage to be
applied to the base rate into the ST,
OT, DT,
R4, R5,
and/or R6 text boxes for
Swing and/or Graveyard shifts. An empty rate text box will have
a zero once the rates are saved. If applicable, enter the ERP Codes for each labor rates
into the appropriate text boxes.
Rate amount option:
Click the Rate button. Enter the specific rate into the
ST, OT,
DT, R4,
R5, and/or R6
text boxes for Swing and/or Graveyard shifts. An empty
rate text box will have a zero once the rates are saved. If applicable,
enter the ERP Codes
for each labor rates into the appropriate text boxes.
Click the Save button
to save and display the shift differential rates in the Shift Differentials
Listing. The rate effective date appears in the Effective Dates list
box.
Edit a shift differential
Use the editing feature only to make corrections to the initial entries.
Enter new labor rates with new effective dates to change rates. Rate type
cannot be edited.
From the Shift Differentials screen, select a rate effective
date from the Effective Dates
list box to display its shifts and rates in the Shift Differentials
Listing.
From the Shift Differentials Listing, click the Edit
icon on a line item to enable Rates and ERP Codes text boxes.
Make the changes to the rate amount or the ERP codes then click
the Update icon to save and
display the modified rates in the Shift Differentials Listing.
Delete a shift differential
From the Shift Differentials Listing, click the Delete
icon on a line item. The delete confirmation dialog box opens.
Click OK to delete the
selected shift differential.
Related Topic
Labor
Rates