Hover a mouse pointer over the Allocations menu link to display its drop-down menu.
Slide a mouse pointer over to the Allocations to display its menu.
Click Prorate to open
the Prorate Overhead screen.

Hover a mouse pointer over the Allocations menu link to display its drop-down menu.
Slide a mouse pointer over to the Allocations to display its menu.
Click Prorate to open
the Prorate Overhead screen.

The Prorate process automatically allocates specific resources, such as Overhead personnel, to the same cost objects used for the Direct Labor Force based on prior allocations.
If applicable, select a location from the Location drop-down list located at the menu bar.
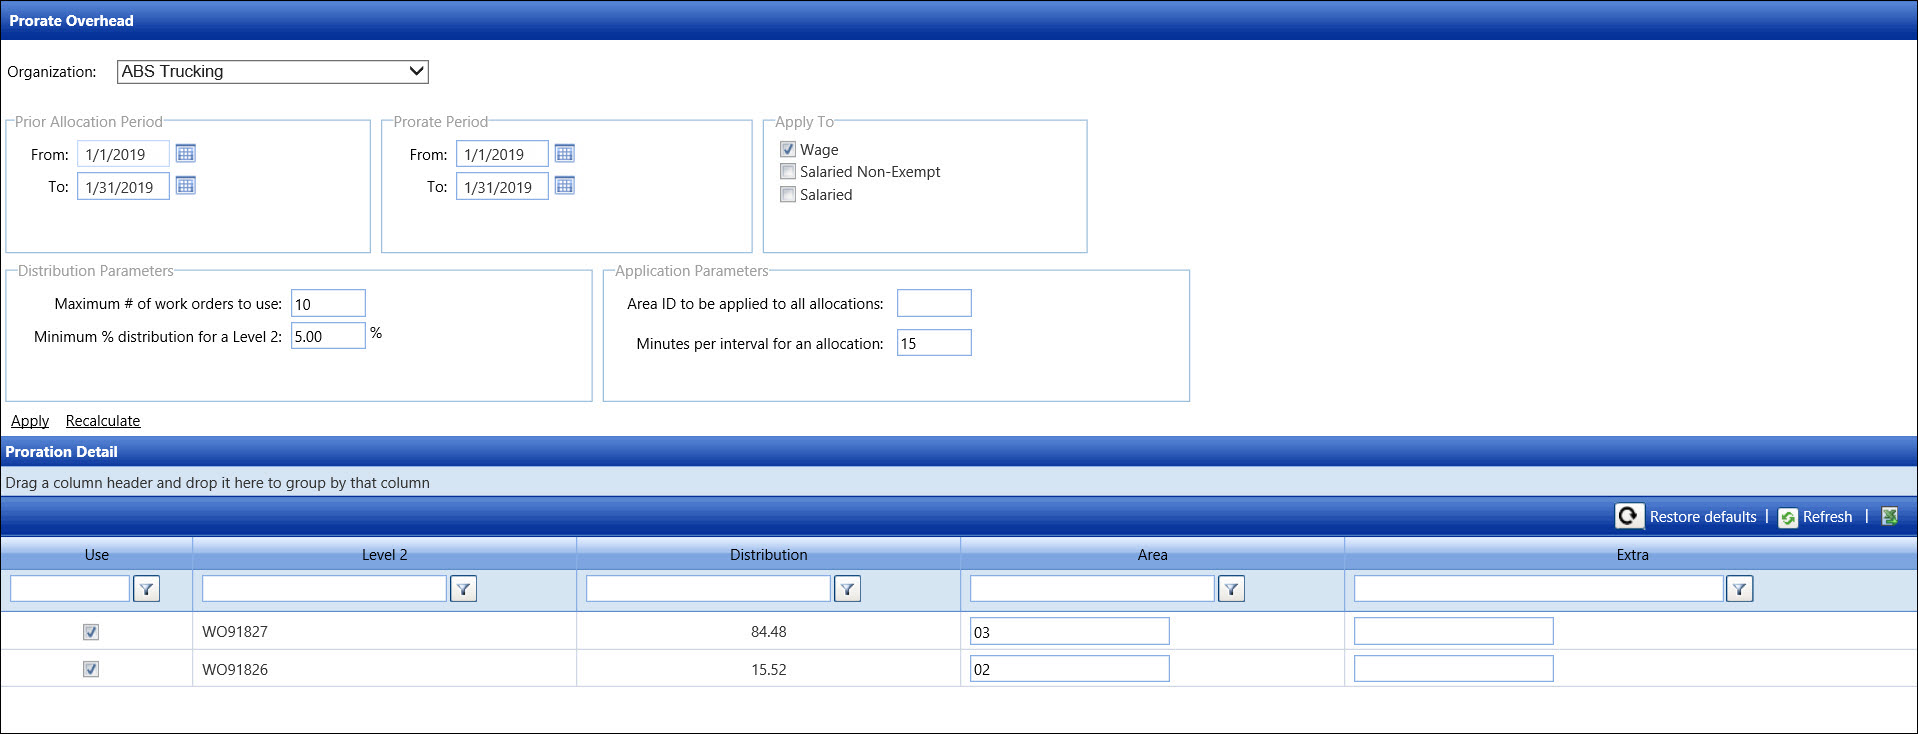
From the Prorate Overhead screen, select an organization from the Organization drop-down list.
From the Prior Allocation Period area, enter a date or date range into the From and To text boxes, or select the dates from the calendars to set the period of time for prior allocations to be used. The allocation information appears in the Proration Detail grid.
From the Prorate Period area, enter the date or date range into the From and To text boxes to apply the new prorated allocations.
From the Apply To area, click the Wage, Salaried Non-Exempt, and/or Salaried checkboxes to select one or more labor type flags for the resources to be prorated. The Apply link will become enabled.
From the Distribution Parameters area, verify the distribution parameters. If applicable, enter a maximum number of work orders (Level 2 cost objects) to use for the new prorated allocations into the Maximum # of work orders to use text box. The work order (Level 2 cost object) information will appear in the Proration Detail grid under the Level 2 column.
Enter a percentage into the Minimum % distribution for a Level 2 text box. This percentage calculation will be used in the calculation that appears in the Proration Detail grid under the Distribution column.
From the Application Parameters area, verify the application parameters. If the allocations are assigned to a specific area ID rather than the area ID assigned to the prior allocations, enter an area ID into the Area ID to be applied to all allocations text box if the allocations are assigned to a specific area ID rather than the area ID assigned to the work order.
Enter the number of minutes into the Minutes per interval for an allocation text box. This number provides that all time allocations are rounded to the nearest incremental value, corresponding to the value supplied in this text box.
From the Proration Detail grid, the selected checkboxes on the Level 2 line items will be included in the allocation mix. Deselect the checkboxes to exclude them from the Level 2 mix.
Click the Recalculate link to recalculate the selected input. The distributions are recalculated. The work orders that are not selected will have a zero value for the distributions.
If applicable, make changes to the area ID in the Area ID text box and/or enter additional information in the Extra text box.
Click Apply to allocate the prorated overhead. The personnel, with one of the labor type for prorations flags (Wage, Salaried Non-Exempt, and/or Salaried) that have not had their available hours allocated, will have their net hours spread across the selected cost objects in the percentage indicated in the Proration Detail grid.
If the labor resource's hours have already been allocated, the distributions will not apply to that labor resource. The displayed number in the Maximum # of work orders to use, the Minimum % distribution for a Level 2, and the Minutes per interval for an allocation text boxes are from the previously performed distribution.
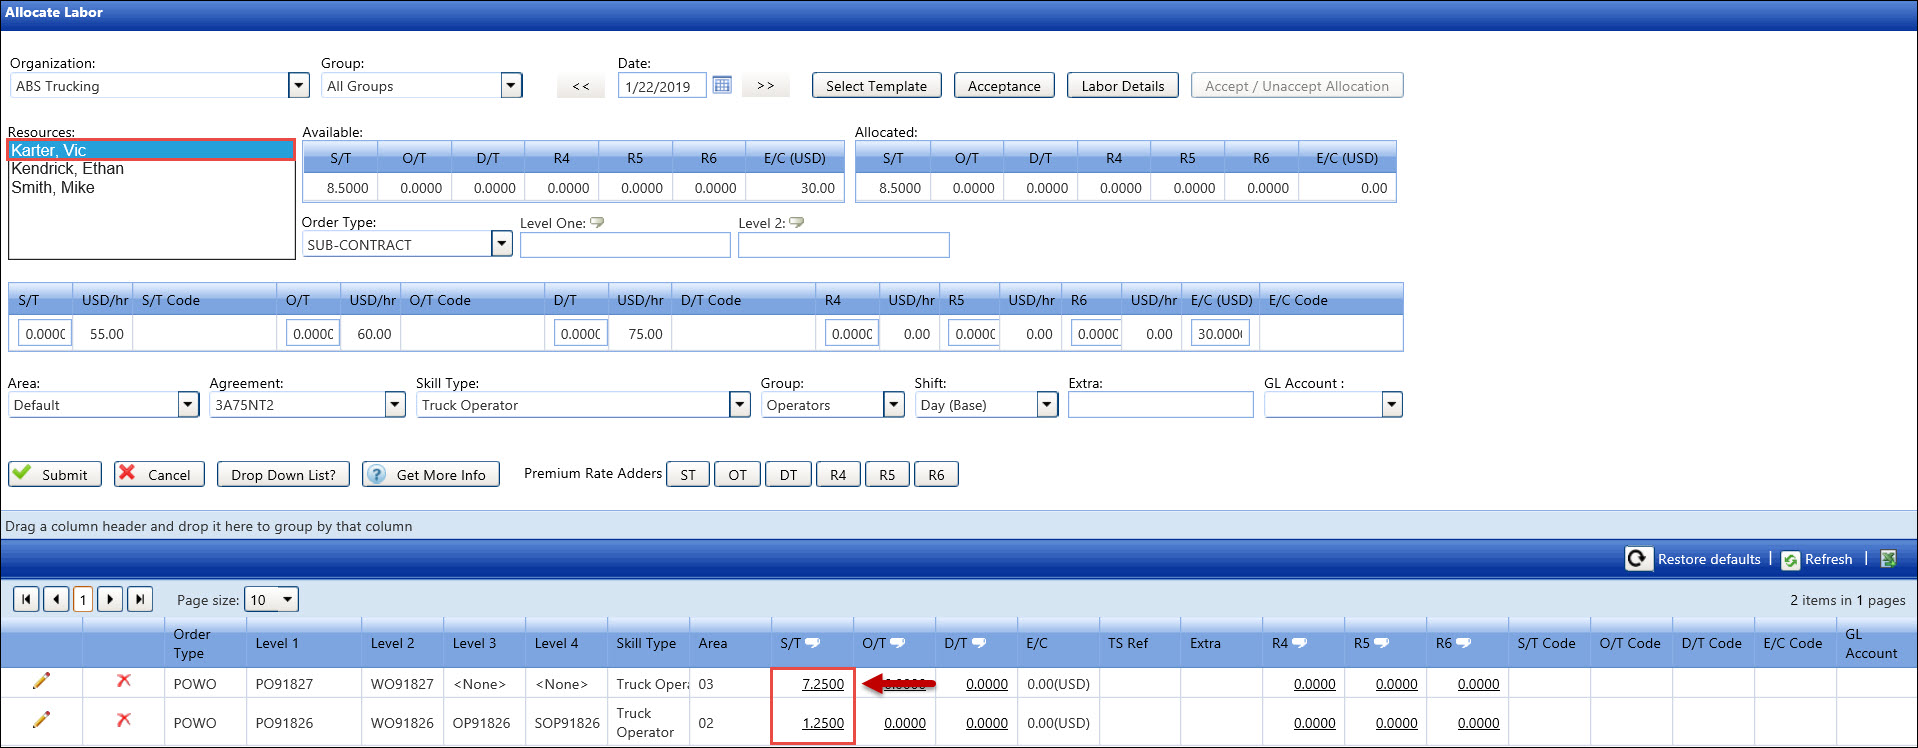
Click the Allocations menu link to open the Allocate Labor screen.
From the Resources list box, select personnel, with one of the labor type for prorations flags (Wage, Salaried Non-Exempt, and/or Salaried) that have not had their available hours allocated.
From the grid, the selected personnel's allocated hours are
distributed across the work orders that applied during the prorated
process.

Related Topics