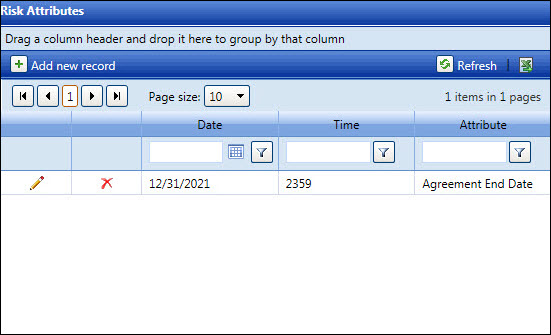
Adding a labor resource's risk attributes is completed in the Labor
Information screen. All text boxes are required entries. Unless the risk
attribute is added when a new labor resource is created, a labor resource
must be selected from the View Resources screen.
Click the Resources
menu link to open the View Resources screen directly.
From the View Resources screen, select an organization from
the Organization drop-down list to display the available resources
in the Resource Listing.
From the Labor Resource Listing, click a labor resource to open
the Labor Information screen, displaying the selected labor resources
detailed information.
From the Risk Attribute grid, click the Add
new record button to enable the Date and Time text boxes and
the Attribute drop-down list.
Enter a date into the Date
text box. Alternatively, select a date from the calendar. (see also
Date
Format)
Enter an expiration time (without a colon), in HHMM format,
into the Time text box.
Select a risk attribute from the Attribute
drop-down list.
Click the Update icon
to save and display the risk attribute in the Risk Attribute grid.
Repeat steps to add another risk attribute.
Risk attribute's date and time are the only two entries that can be
modified.
The risk attribute is displayed as a read-only field after it is saved.
If a mistake is made, delete the selected risk attribute.
