This tutorial is for TRACK users,
typically TRACK Coordinators or Vendor Timekeepers, who need to resolve
rejected allocations.
When TRACK Authorizers reject
material charges during the Authorization process, a message with the
subject “Allocation Rejected” is sent to Vendor Timekeepers as a TRACK
Internal Message. The Vendor Timekeepers must resolve the rejected allocations
to reprocess for payment.
Resolving the rejected allocations
will depend on the circumstances.
The Filter option is available
to limit the display of the rejected allocations.
After
accessing TRACK, hover a mouse pointer over Allocations.
Drop
down to Acceptance, then select
Material to open the Accept
Material Charges screen.
Alternatively,
click the Acceptance button
on the Allocate Material Charges screen to open the Accept Material
Charges screen.
If
applicable, select an organization from the Organization
drop-down list and an agreement from the Agreement
drop-down list.
Select
a material group from the Group
drop-down list or proceed to the next step.
Enter
a date or a date range into the From
and To text boxes or select
the dates from the calendars.
If
applicable, select an option from the Filter
By drop-down list to limit the display of the rejected allocations.
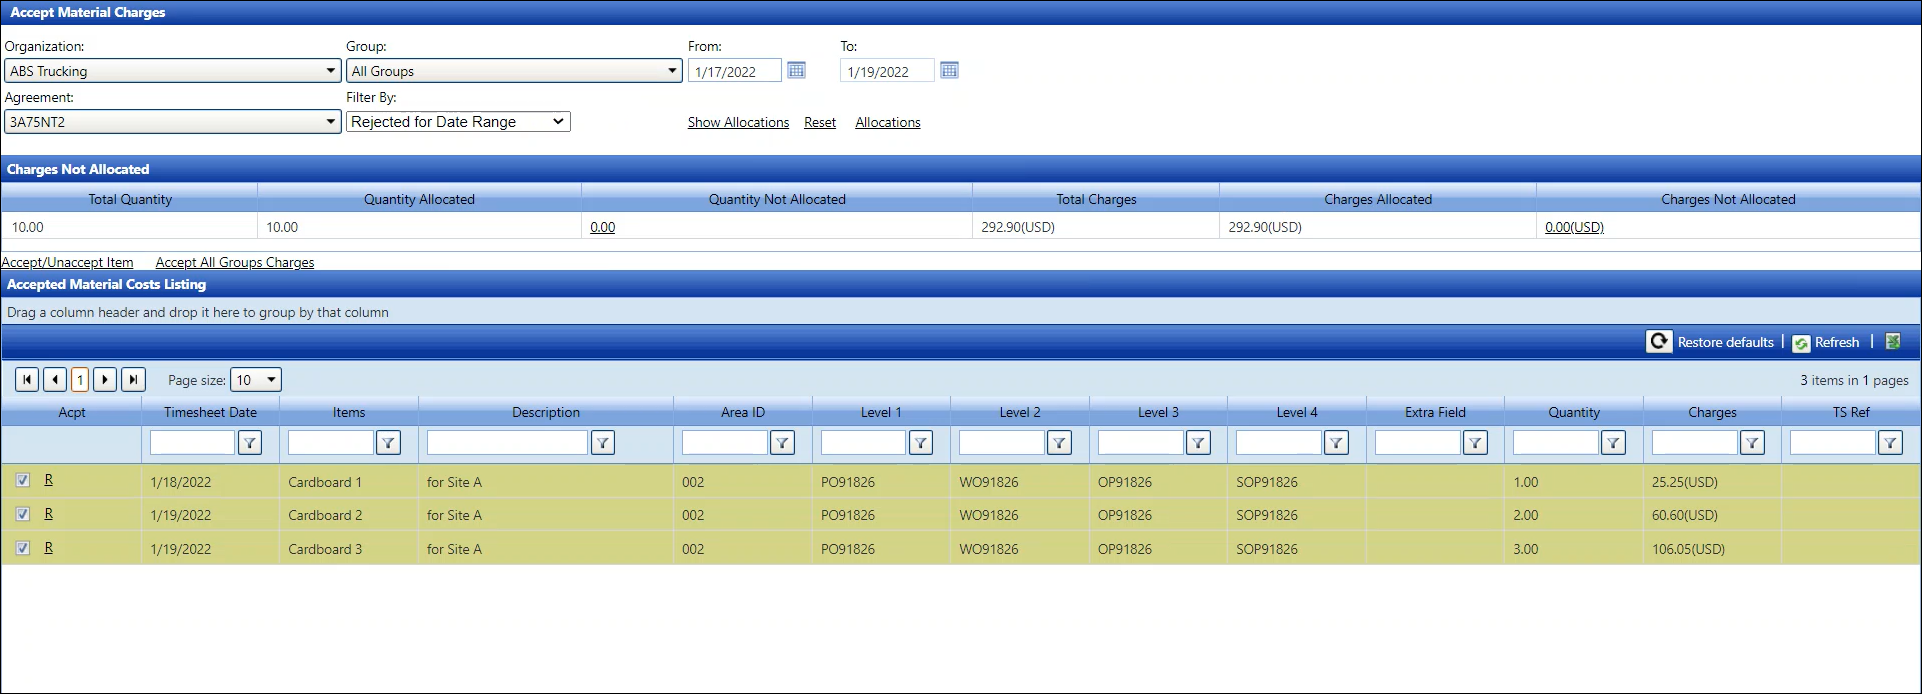
Click
Show Allocations. The rejection
indicator “R” is displayed on each rejected line item in the Accepted
Material Costs Listing.
Start
resolving the rejections by deselecting the checkboxes on multiple
line items.
Click
Accept/Unaccept Items. The
selected line items for the rejected allocations are unshaded.
Click
Allocations to open the Allocate
Material Charges screen.
Alternatively,
hover a mouse pointer over Allocations.
Drop down to Allocations,
then select Material Charges
to open the Allocate Material Charges screen.
If
applicable, enter a date into the Allocation
Date text box or select a date from the calendar to display
the rejected allocations in the Material Charges Allocation Detail
grid.
Resolve
the rejected allocations. The Allocated
status for the re-allocations is displayed under the Status
column.
Click
the Acceptance button to return
to the Accept Material Charges screen.
Enter
a date or a date range into the From
and To text boxes or select
the dates from the calendars.
Click
Show Allocations to display
the re-allocated items in the Accepted Material Costs Listing.
Click
a checkbox on one or more line items to select the re-allocated items.
Click
Accept/Unaccept Items to accept
the selected re-allocated items. The message, "Charges successfully
accepted!" is displayed, and the accepted line items are shaded.
From
the Accept Material Charges screen, select an organization from the
Organization drop-down list
and an agreement from the Agreement
drop-down list, if applicable.
Select
a material group from the Group
drop-down list or proceed to the next step.
Enter
a date or a date range into the From
and To text boxes or select
the dates from the calendars.
If
applicable, select an option from the Filter
By drop-down list to limit the display of the rejected allocations.
Click
Show Allocations. The rejection
indicator “R” is displayed on each rejected line item in the Accepted
Material Costs Listing.
Start
resolving the rejections by clicking the “R”
to unaccept the selected allocation and directly open the Allocate
Material Charges screen, displaying the allocation with the Rejected
status under the Status column.
Resolve
the rejected allocation. The Allocated
status for the re-allocation is displayed under the Status
column.
Click
the Acceptance button to return
to the Accept Material Charges screen.
Enter
a date or a date range into the From
and To text boxes or select
the dates from the calendars.
Click
Show Allocations to display
the re-allocation in the Accepted Material Costs Listing.
Click
a checkbox on a line item to select the re-allocated item.
Click
Accept/Unaccept Items to accept
the selected re-allocated item. The message "Charges successfully
accepted!" is displayed, and the accepted line item is shaded.
Repeat
the steps to resolve another rejected allocation.
When material charges are rejected
during the Authorization process, Vendor Timekeepers will receive a TRACK
Internal Message with the subject "Allocation Rejected." These
rejected allocations must be resolved to reprocess for payment. After
resolving the rejected allocations, the Authorization process can occur.