Hover a mouse pointer over the Estimating menu link to display its drop-down menu.
Click Build T&M Estimate
to open the Build Time and Material Estimate screen.
If the request for estimate is marked as time and materials estimate, the selected contractor will use the Build Time and Materials Estimate screen to build a unit price estimate.
Hover a mouse pointer over the Estimating menu link to display its drop-down menu.
Click Build T&M Estimate
to open the Build Time and Material Estimate screen.
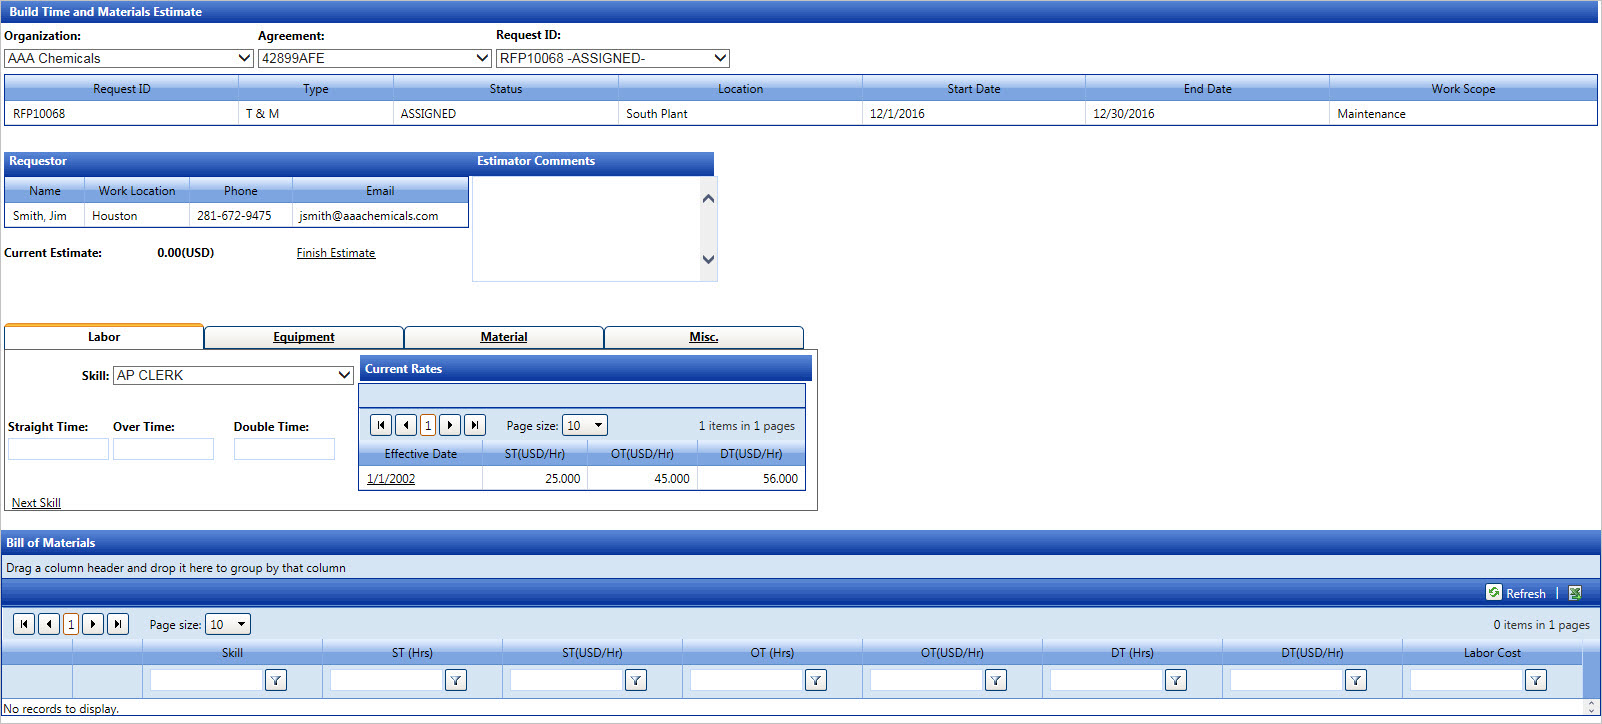
From the Build Time and Material Estimate screen, select an organization from the Organization drop-down list.
Select an agreement from the Agreement drop-down list.
Select a request ID from the Request ID drop-down list. The information from the request ID appears in the table. The requestor’s name and information are displayed in the Requestor table.
The time and material estimate may include labor, equipment, or material. Follow the steps listed below to add labor skills, equipment, material, and miscellaneous information. Once completed, click Finish Estimate to save and return the time and material estimate to the owner for acceptance. The status of the selected estimate changes to Estimating.
The Labor tab is displayed
by default.
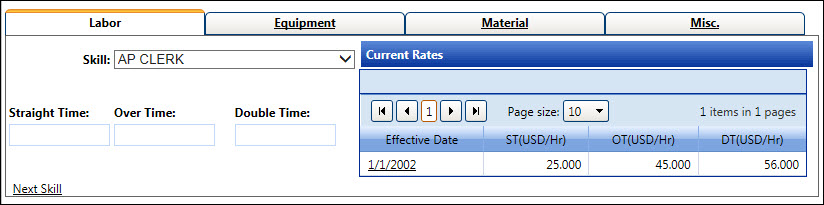
Select a labor skill from the Skill drop-down list. The information for the selected labor skill is displayed in the Current Rates grid.
Enter the straight time, overtime, and double time into the Straight Time, Overtime, and Double Time text boxes.
Click Next Skill to save and display the new labor skill information in the Bills of Materials grid.
Repeat the steps to enter another labor skill.
Click the Equipment
tab to open the Equipment area.
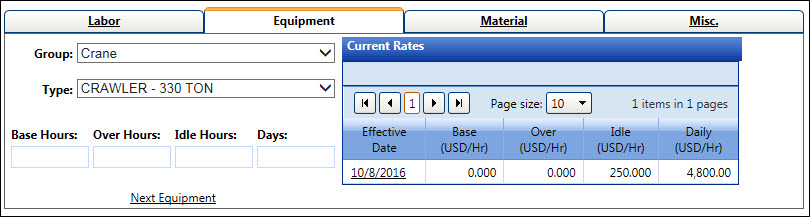
Select an equipment group from the Group drop-down list.
Select an equipment type from the Type drop-down list. The information for the selected equipment is displayed in the Current Rates grid.
Enter the base hours, over hours, idle hours, and/or days into the Base Hours, Over Hours, Idle Hours, and Days text boxes.
Click Next Equipment to save and display the equipment information in the Bills of Materials grid.
Repeat the steps to enter another equipment.
Click the Material tab
to open the Material area.
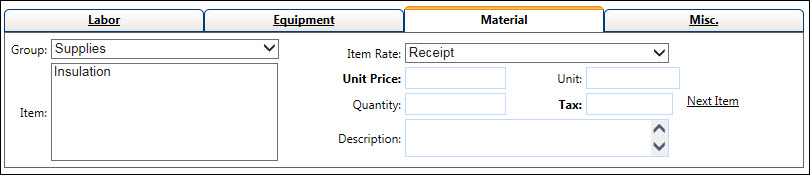
Select a material group from the Group drop-down list. The items from the selected material group are displayed in the Item list box.
Select a material item from the Item list box to highlight it.
Select a material item rate from the Item Rate drop-down list.
Depending on the selected item rate, enter unit price, unit, quantity, tax, and/or description into the appropriate text boxes.
Click Next Item to save and display the material item information in the Bills of Materials grid.
Repeat the steps to enter another material item.
Click the Misc. tab
to open the Miscellaneous area.

Enter a miscellaneous description into the Misc. Description text box.
Enter a miscellaneous amount into Misc. Amount text box.
The star item is a miscellaneous item that needs to be included in the agreement. If a new miscellaneous item is a star item, the agreement may need to be modified. Click the Star Item checkbox or proceed to the next step.
Click Add Misc to save and display the miscellaneous item in the Bills of Materials grid.
Repeat the steps to enter another miscellaneous information.