Authorization
Reassignment
The Track application has a feature
that enables the users to reassign accepted allocations from one area
ID to another. The areas are used in the Track application to identify
the supervisors who are responsible for the ongoing projects.
The Authorization Reassignment
is a useful tool to prevent delays in the daily process and payments in
the absence of the supervisors. If the supervisors are out of the office,
they can reassign their work to other supervisors without any interruptions
to the daily process. Their work is completed by other supervisors when
the reviewing and authorizing of the accepted allocations occur. Since
the Authorization Reassignment is set up for a defined duration, the supervisors
can continue their responsibilities when they return to the office.
Before using the Authorization
Reassignment feature, make sure the users are assigned the following profile
rules.
The
users must be assigned to the SET:ADM:
User can Reassign Authorizations profile rule to utilize the
Authorization Reassignment feature.
If
the users are assigned to the SET:ADM:
User can view all Area IDs for Reassignment of Authorizations
profile rule, they are allowed to see all area IDs in the To Area
IDs drop-down list, regardless of the use of Track DOA in the Authorization
Reassignment page.
Set up the Authorization Reassignment
After
accessing Track, hover a mouse pointer over Settings.
Drop
down to Configuration then
select Authorization Reassignment
to open the Authorization Reassignment screen.
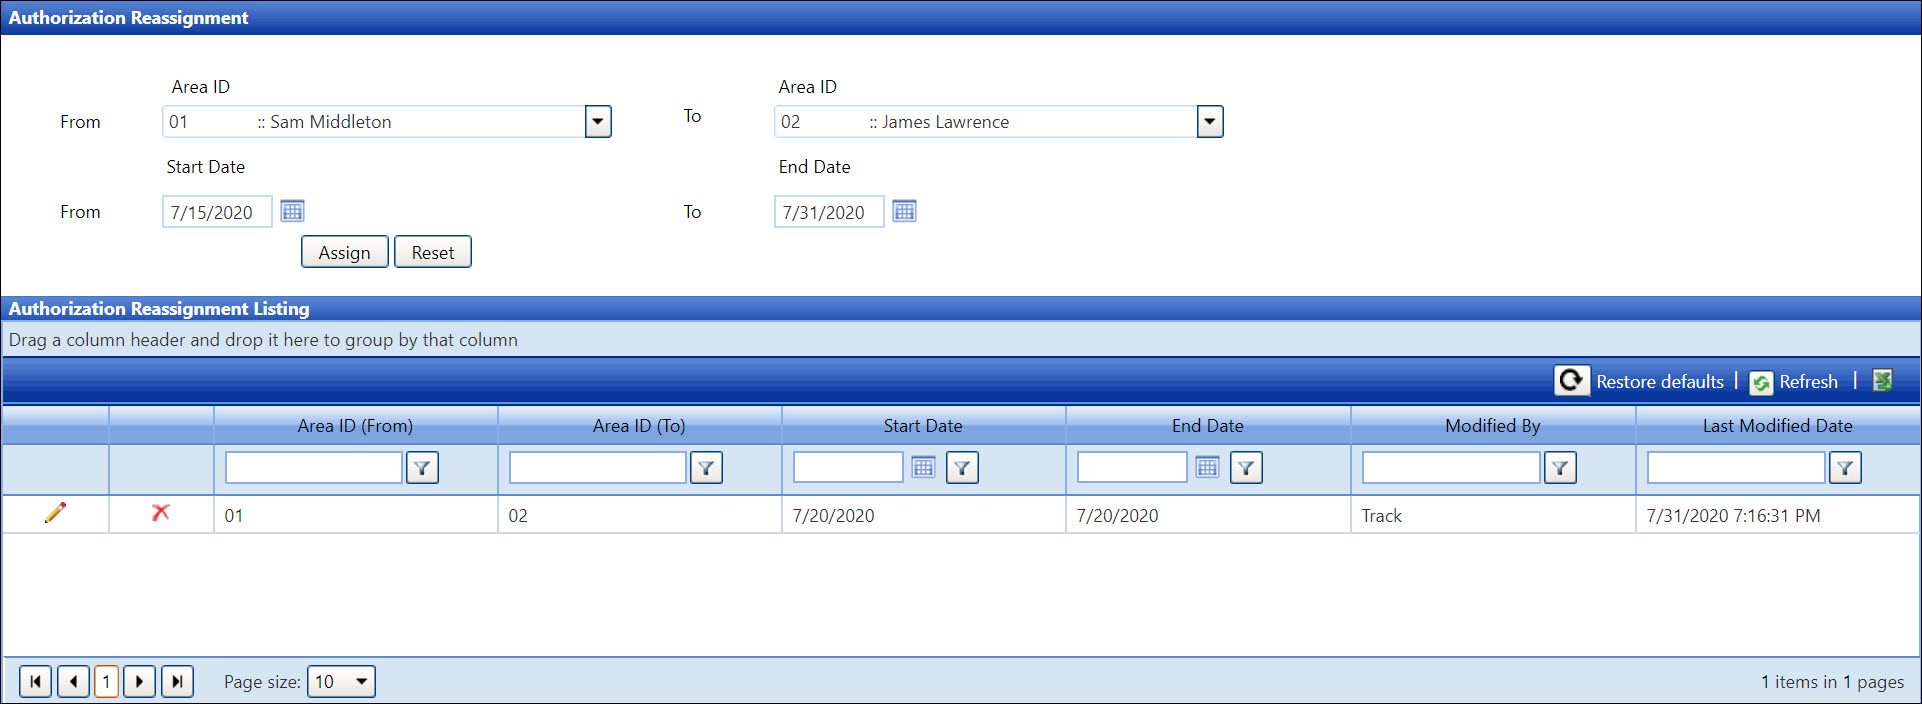
The
area ID in the From Area ID
drop-down list is based on the area IDs assigned to the users along
with their user profile. Select an area ID from the drop-down list
for the supervisor who will be absent from work.
Select
an area ID from the To Area ID
drop-down list to select the designated supervisor who will perform
the reassignment.
When reassigning the authorizations,
keep in mind the following concepts.
Multiple
level reassignments are not allowed. The To Area ID cannot assign
reassignments assigned to them to another Area ID. For example, if
JSmith (area ID 1) reassigns his work to DLawrence (area ID 2), then
DLawrence would not be able to pass JSmith’s reassigned work to other
supervisors. DLawrence would need to complete the reassignment for
JSmith.
If
DLawrence passes his work to another supervisor before JSmith reassigns
his work to DLawrence, Track will allow the reassignment. However,
Track would display a message that an alternate reassignment should
be considered because there may be a lack of availability from other
supervisors.
To enforce DOA limits during
Authorization Reassignment so that the users cannot select an area ID
with less than their DOA limit, then all of the following steps must be
applied.
The
Track User ID is selected from the Track User Name drop-down list
at the Area Master screen.
The
total amount of the DOA limit is entered into the Total DOA Limit
drop-down list on the Delegation Of Authority screen. This entry is
required for the Track application to perform the DOA comparison.
The
Enforce DOA Limit on Authorization Reassignment Page feature is enabled
at the Location Settings screen.
If the DOA is not used, the users
will be able to select from any area ID available in the To
Area ID drop-down list.
If the SET:ADM:
User can view all Area IDs for Reassignment of Authorizations profile
rule is assigned to the users, such as Track Coordinators, then they will
be able to perform reassignments for all users regardless of DOA limits
to avoid delays.
The
authorization reassignment can be set up for a specific duration and
can only be made to one area ID for a date range. Overlapping reassignments
are not allowed. Enter the start date of the reassignment into the
Start Date
text box or select a date from the calendar.
Enter
the end date of the reassignment into the
End Date text box or select a date from the calendar.
Click
the Assign button. The reassignment
is saved and displayed in the Authorization Reassignment Listing.
The Area ID Forwarding functionality
is to allow the supervisors, who are presently working, the ability to
forward the allocations that are pending authorization to other supervisors.
The situation may be that they receive the allocations in error and need
to assign them to other supervisors to correct the issue.
For the Authorization Reassignment
feature, the area IDs only receive temporary reassignment from other area
IDs and no change in the Area ID occurs. For example, JSmith (area ID
1) only assigns his work to another area ID, such as DLawrence (area ID
2), within the stated duration. Once the reassignment duration is completed,
JSmith (area ID 1) will resume his responsibilities.
After the Authorization Reassignment
is set up, the designated supervisors can work on their reassignment by
reviewing and authorizing the hours and costs at the Authorization Central
or Express Central screen.