Hover a mouse pointer over the Allocations menu link to display its drop-down menu.
Slide a mouse pointer over to the Progress Jobs to display its menu.
Click Progress Extra Units
to display the Progress Extra Unit screen.
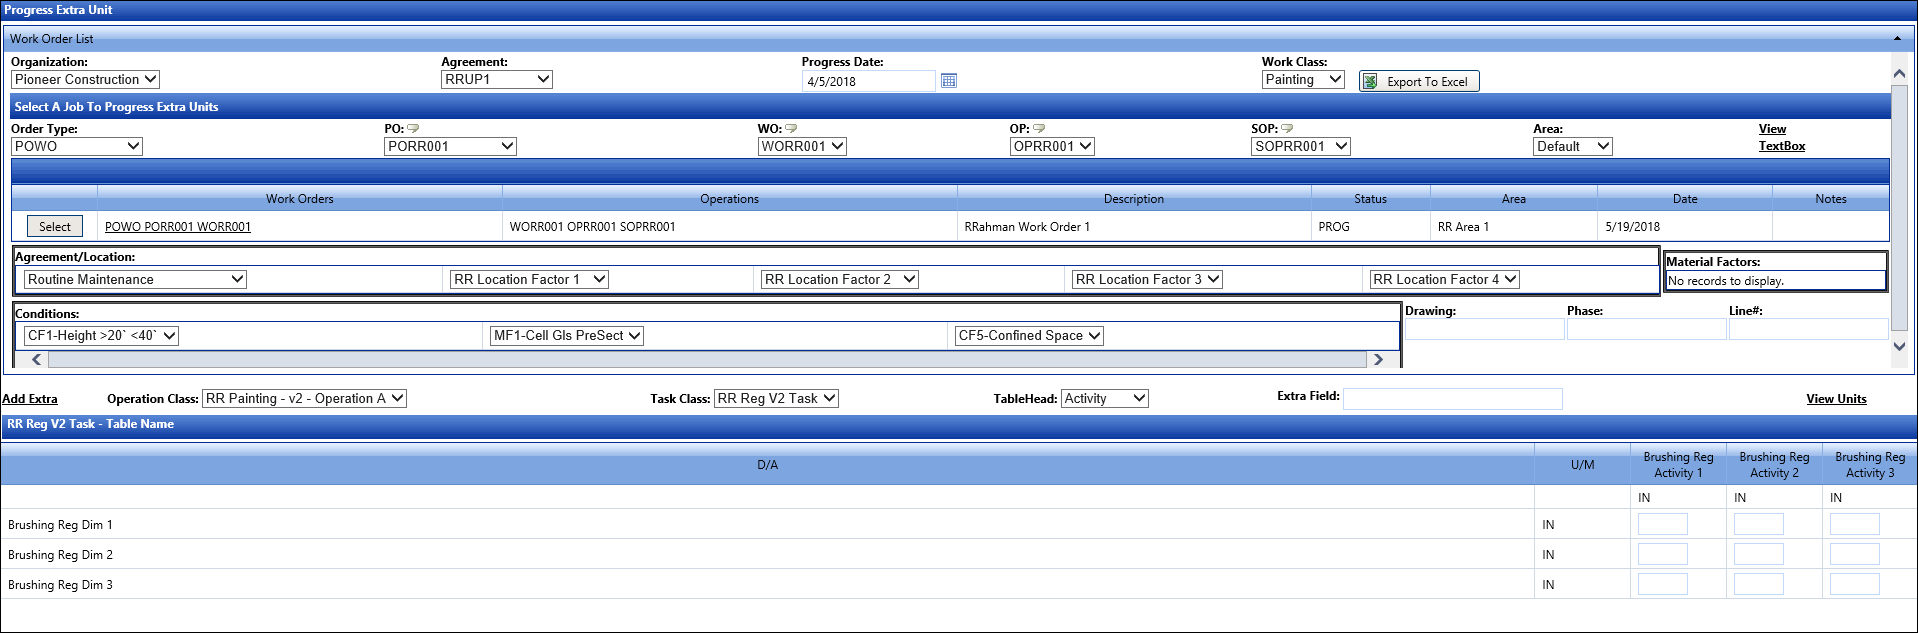
Select the appropriate parameters to progress extra units.
Hover a mouse pointer over the Allocations menu link to display its drop-down menu.
Slide a mouse pointer over to the Progress Jobs to display its menu.
Click Progress Extra Units
to display the Progress Extra Unit screen.
From the Progress Extra Units screen, select an organization from the Organization drop-down list.
Select an agreement from the Agreement drop-down list.
Enter the date that the workers performed the work into the Progress Date text box, or select the date from the calendar.
Select a work class from the Work Class drop-down list. The options in the Operation Class and Task Class drop-down lists are updated.
Select an order type from the Order Type drop-down list.
Enter the Level 1, Level 2, Level 3 or Level 4 information into the appropriate text boxes. If the DropDownList feature is enabled, then select the Level 1, Level 2, Level 3, or Level 4 from the appropriate drop-down lists.
Select an area from the Area drop-down list, if applicable.
If the selected cost object is available for use, then the Commit Work link is enabled. Click the Commit Work link to add the work order information to the grid.
Click the Select button to select the work orders in the job grid.
Depending in the selected norms set, select the factors from the appropriate Agreement/Location drop down lists.
Select conditions from the Conditions drop-down lists, if applicable.
Select an operation class from the Operation Class drop-down list.
Select a task class from the Task Class drop-down lists.
Enter additional informational information into the Extra Field text box, if applicable.
From the Dimension or Activity grid, enter the value into the appropriate text boxes.
Click the Add Extra link to progress the extra units.
Click the View Units link to display the View Extra Units pop-up dialog box, displaying the extra units’ information.
From the Progress Extra Unit screen, select the organization, agreement, progress date, and work class from the appropriate drop-down lists.
Click the Export To Excel button. The Excel application opens and displays the parameters of the selected options.
Enter and save the information as Progress_Extra_Units_updated.xlsx.
Follow the instructions as directed in Track Imports to import progress extra units, ensuring the selection of the Unit Price Extra Units Progression option from the Import Type drop-down list.